
Introduction
For a while now, I’ve been wanting to move away from the cloud. I’ve paid for Netflix, Disney Plus, Apple and Google cloud storage, etc etc. Individually they are fine, however the monthly bills have really added up. Even after password sharing, the average American spends almost $1000 on streaming a year. What a waste!
Can I take a few hundred dollars and an old gaming computer to build something better? Can I build… a network attached storage device?
What is a NAS
A network attached storage device is a computer that does exactly as its name implies - it lives on your local network and stores whatever you want. That can be anything from your taxes to photos to movies and TV shows. People often use their NAS as a private home server. Almost every subscription service has an open source equivalent - thus more paying for Netflix!
Note: This assumes you aren’t watching a Netflix original and have the physical Blue-ray or DVD.
However, it’s not that easy. First, you still need to adhere to copyright and licensing. Personally, I do not plan on sailing the high seas. Second, you need to decide which device/software you will use. There are many options:
Each of them has advantages and disadvantages. To be honest, I am not qualified to make any recommendations. Since this is my first NAS, and I managed to buy a license to the HexOS beta, I decided that HexOS was the way to go!
Why HexOS
Purportedly, HexOS is the beginner friendly private home server made by Eshtek. It wraps TrueNAS, so it has all the powerful tools and infrastructure from the years of TrueNAS development. However, it hides many of the obscure configurations and headaches that users of TrueNAS struggle with.
Even though the software is still in beta, it should be easier to use in the long term. When it first launched, I bought a perpetual license at the low price of $99. I have no idea if HexOS will ever fully release, let alone if it will be a good product.
Even if Eshtek goes under and stops working on HexOS, it still wraps TrueNAS. Thus, I can just continue using my server as a TrueNAS box. I’ll leave it to the reader whether or not HexOS is a good value at the $99 price point - let alone the release price of $299. I believe there will be a monthly subscription option, but that is not yet available.
Hardware
Besides the hard drives (HDDs), everything I used in this project is something that I already owned. For this project, I am using my over 10 year old gaming computer from high school. It contains some ancient hardware:
- Motherboard: INTEL Desktop Board DP55WB (released 2009)
- Memory: 8 GB of DDR3 ram
- CPU: Intel(R) Core(TM) i5 CPU 760 @ 2.80GHz
- GPU: NVIDIA GeForce GTX 560 (released 2011)
Luckily, all these components still worked. Although I did need to replace the CMOS battery.
I also bought 3 Seagate BarraCuda 4 TB HDDs. However, as I will explain later, that ended up being a mistake. Since one drive will be used for parity, that means I have 8 TB total of usable storage. Even though we are missing out on 4 more terabytes, running the drives in RAID will allow up to one drive to fail before data loss occurs. This redundancy ought to make my NAS safer and more reliable.
One thing I did consider, but decided against, was to use re-certified drives. These drives are much cheaper, however they are also more likely to fail. Since this is my first NAS, I didn’t want to risk it. Additionally, the new drives could be purchased locally. After a drive to my local MicroCenter, I had all the storage I would need.
I bought 3 drives since that is the minimum number for an expandable pool in HexOS. Otherwise, it would be harder to scale up the pool size.
Finally, HexOS needs us to provide a boot drive. Since my motherboard predates the introduction of M.2, I purchased the cheapest 256 GB SSD I could find.
Installation
At this point, the setup guide is only available to paying customers in the Beta. However, it is straight forward and is fairly recognizable to anyone that has installed an OS like Linux. It’s not something I’d expect a my tech-illiterate family members to accomplish, however it was fairly straight forward for me.
After picking a boot drive, setting an Admin password, and disabling EFI booting (I have old hardware), all you need to do is wait for the install to complete.
Taken from the Installation guide
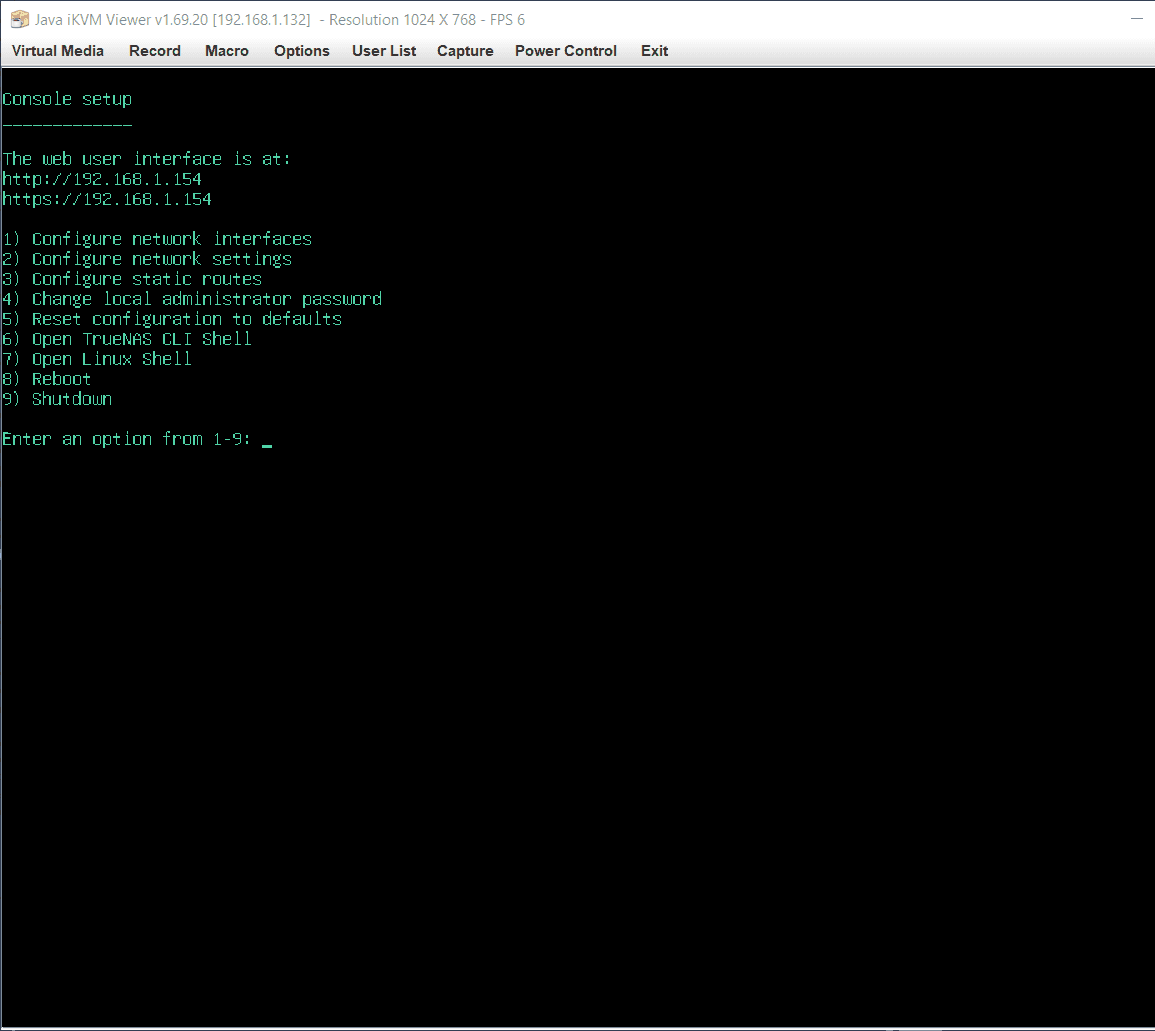
Finally, the guide redirects the reader to visit deck.hexos.com. This is where I ran into my first issue with the installation.
Wi-fi
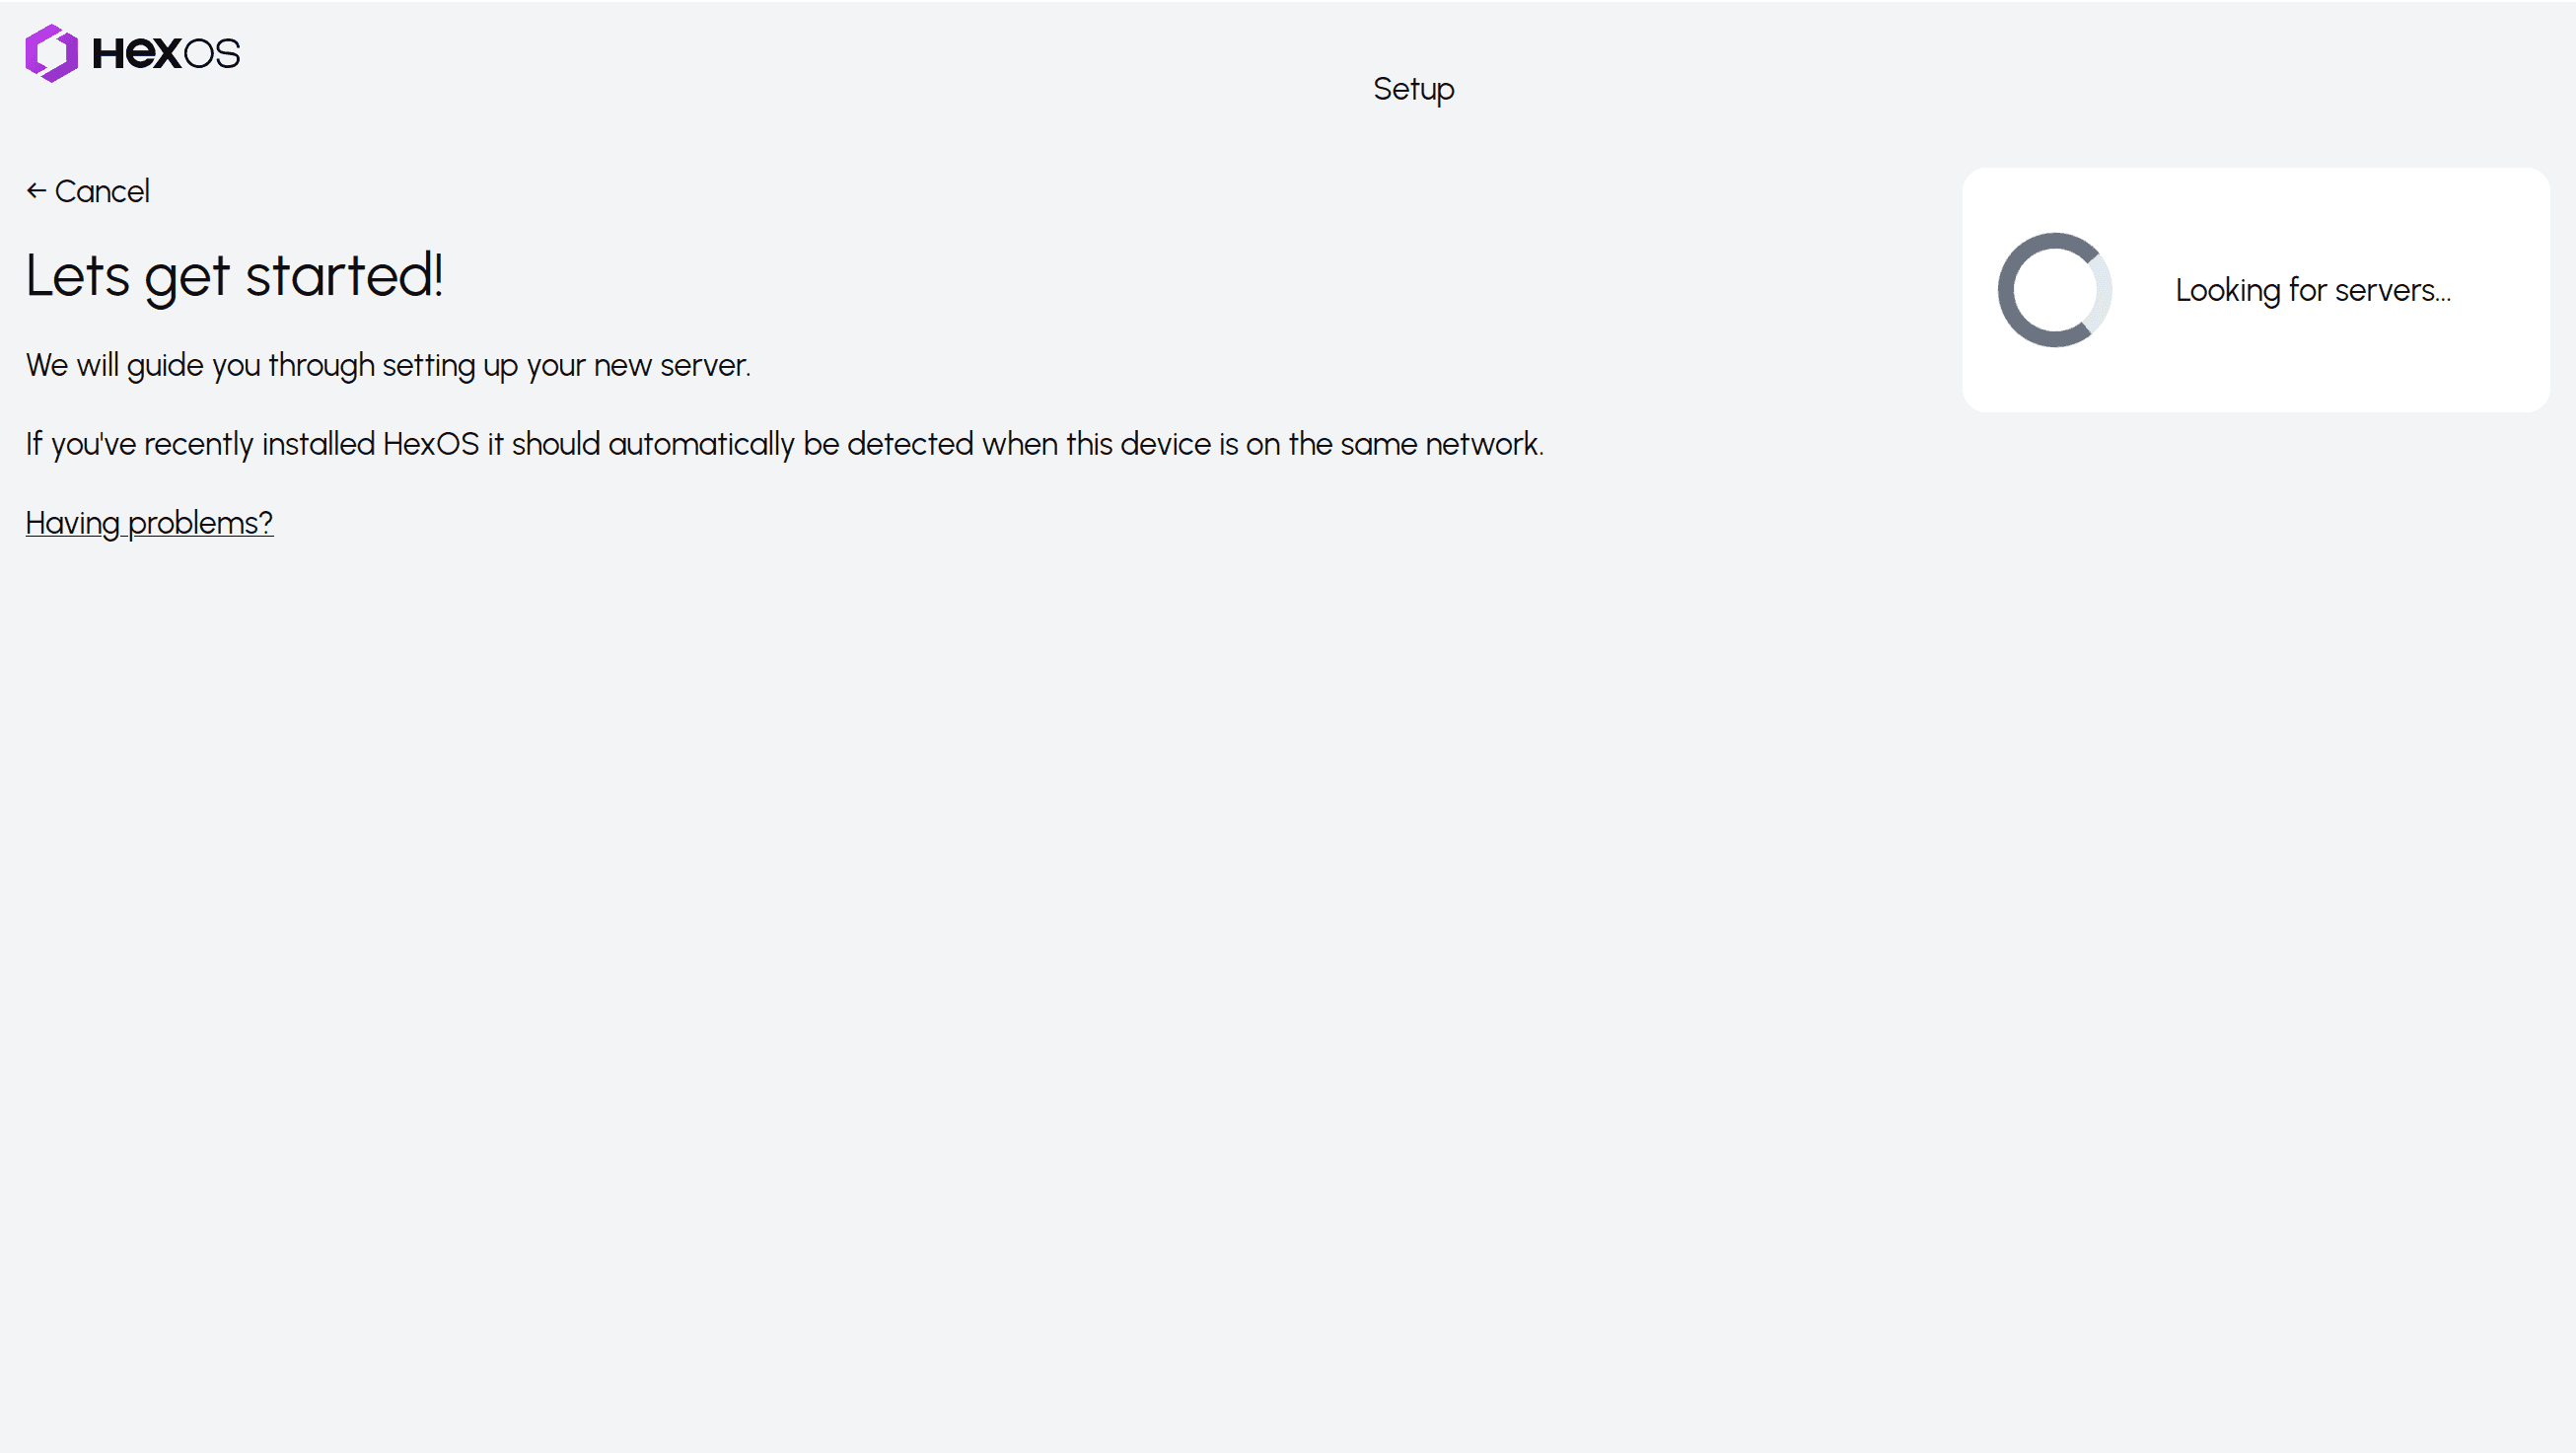
I waited on this screen for quite a long. After 5 minutes, I remembered that I hadn’t entered the password anywhere. In fact, the guide has no reference to Wi-Fi. Looking through the CLI menu, I didn’t find anything there either.
After googling, it seems like TrueNAS, and thus HexOS, does not support Wi-Fi. You can’t even setup HexOS without an Ethernet cable! Since I did not have a spare cable, I took another drive to MicroCenter.
If you are in an apartment or dorm where access to the router is limited or prevented, using HexOS may not be an option for you. Luckily for me, I had space available near my router. However, I can imagine this being an issue for others. Please keep that in mind before purchasing the license.
SMR Drives
After running the cable, I was finally able to add my new server! Unfortunately, I ran into another issue.
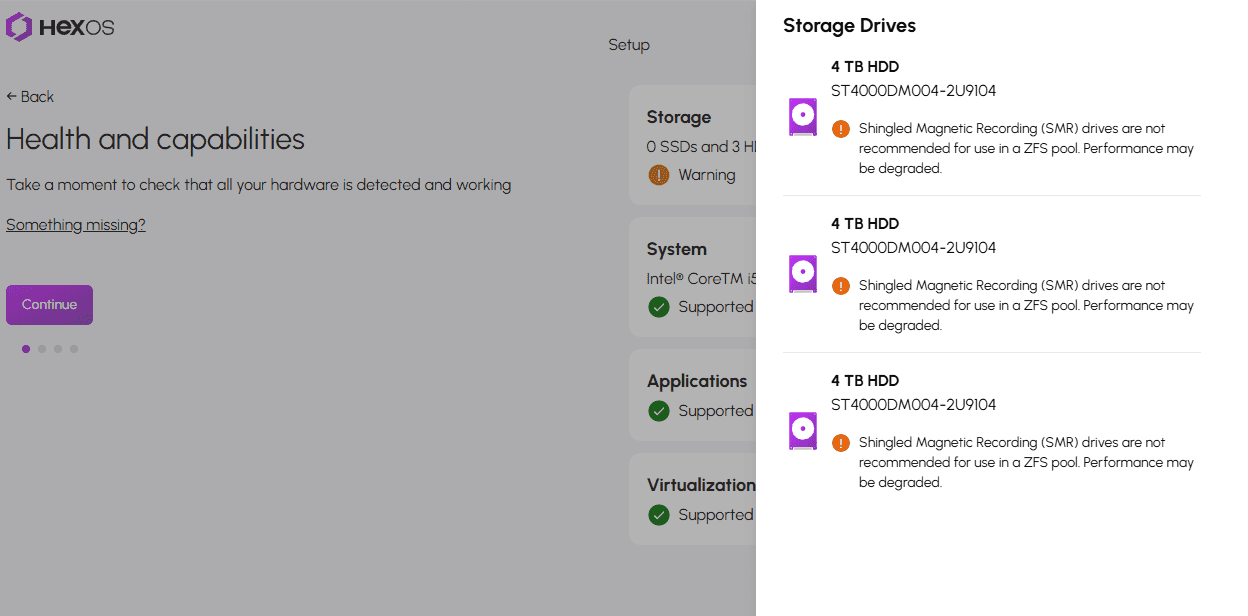
When I first saw this, I felt blindsided. After spending hundreds on these new drives, it now looks like I can’t use them? After a bit of googling, I learned about SMR. It turns out that the ZFS pools that HexOS/TrueNAS uses do not work well with cheaper HDDs. SMR allows hard drives to store more data per disk, thus reducing the price. However, this comes at the cost of write performance - which is no good for HexOS.
What I want to use is CMR. These drives have lower density and higher cost, however they won’t run into issues with write performance. Since I want to have the flexibility to use my NAS for more than archival storage, I need to exchange my drives for CMR HDDs.
What drives use CMR? In short, I have no idea. The box that the drives come in do not advertise whether they use SMR or CMR. At the time of writing, the amazon sale pages does not list it either. Some online threads recommend using command line tools to query the HDD controllers, but that doesn’t work unless you have already purchased the drive. Others recommend using the cache size as a heuristic, but that can be inconsistent.
Instead, I found a Reddit thread that insists that the IronWolf series from SeaGate utilizes CMR. Putting my trust in the internet, I again drove to MicroCenter and exchanged my drives. After placing them in the NAS, I found they worked!
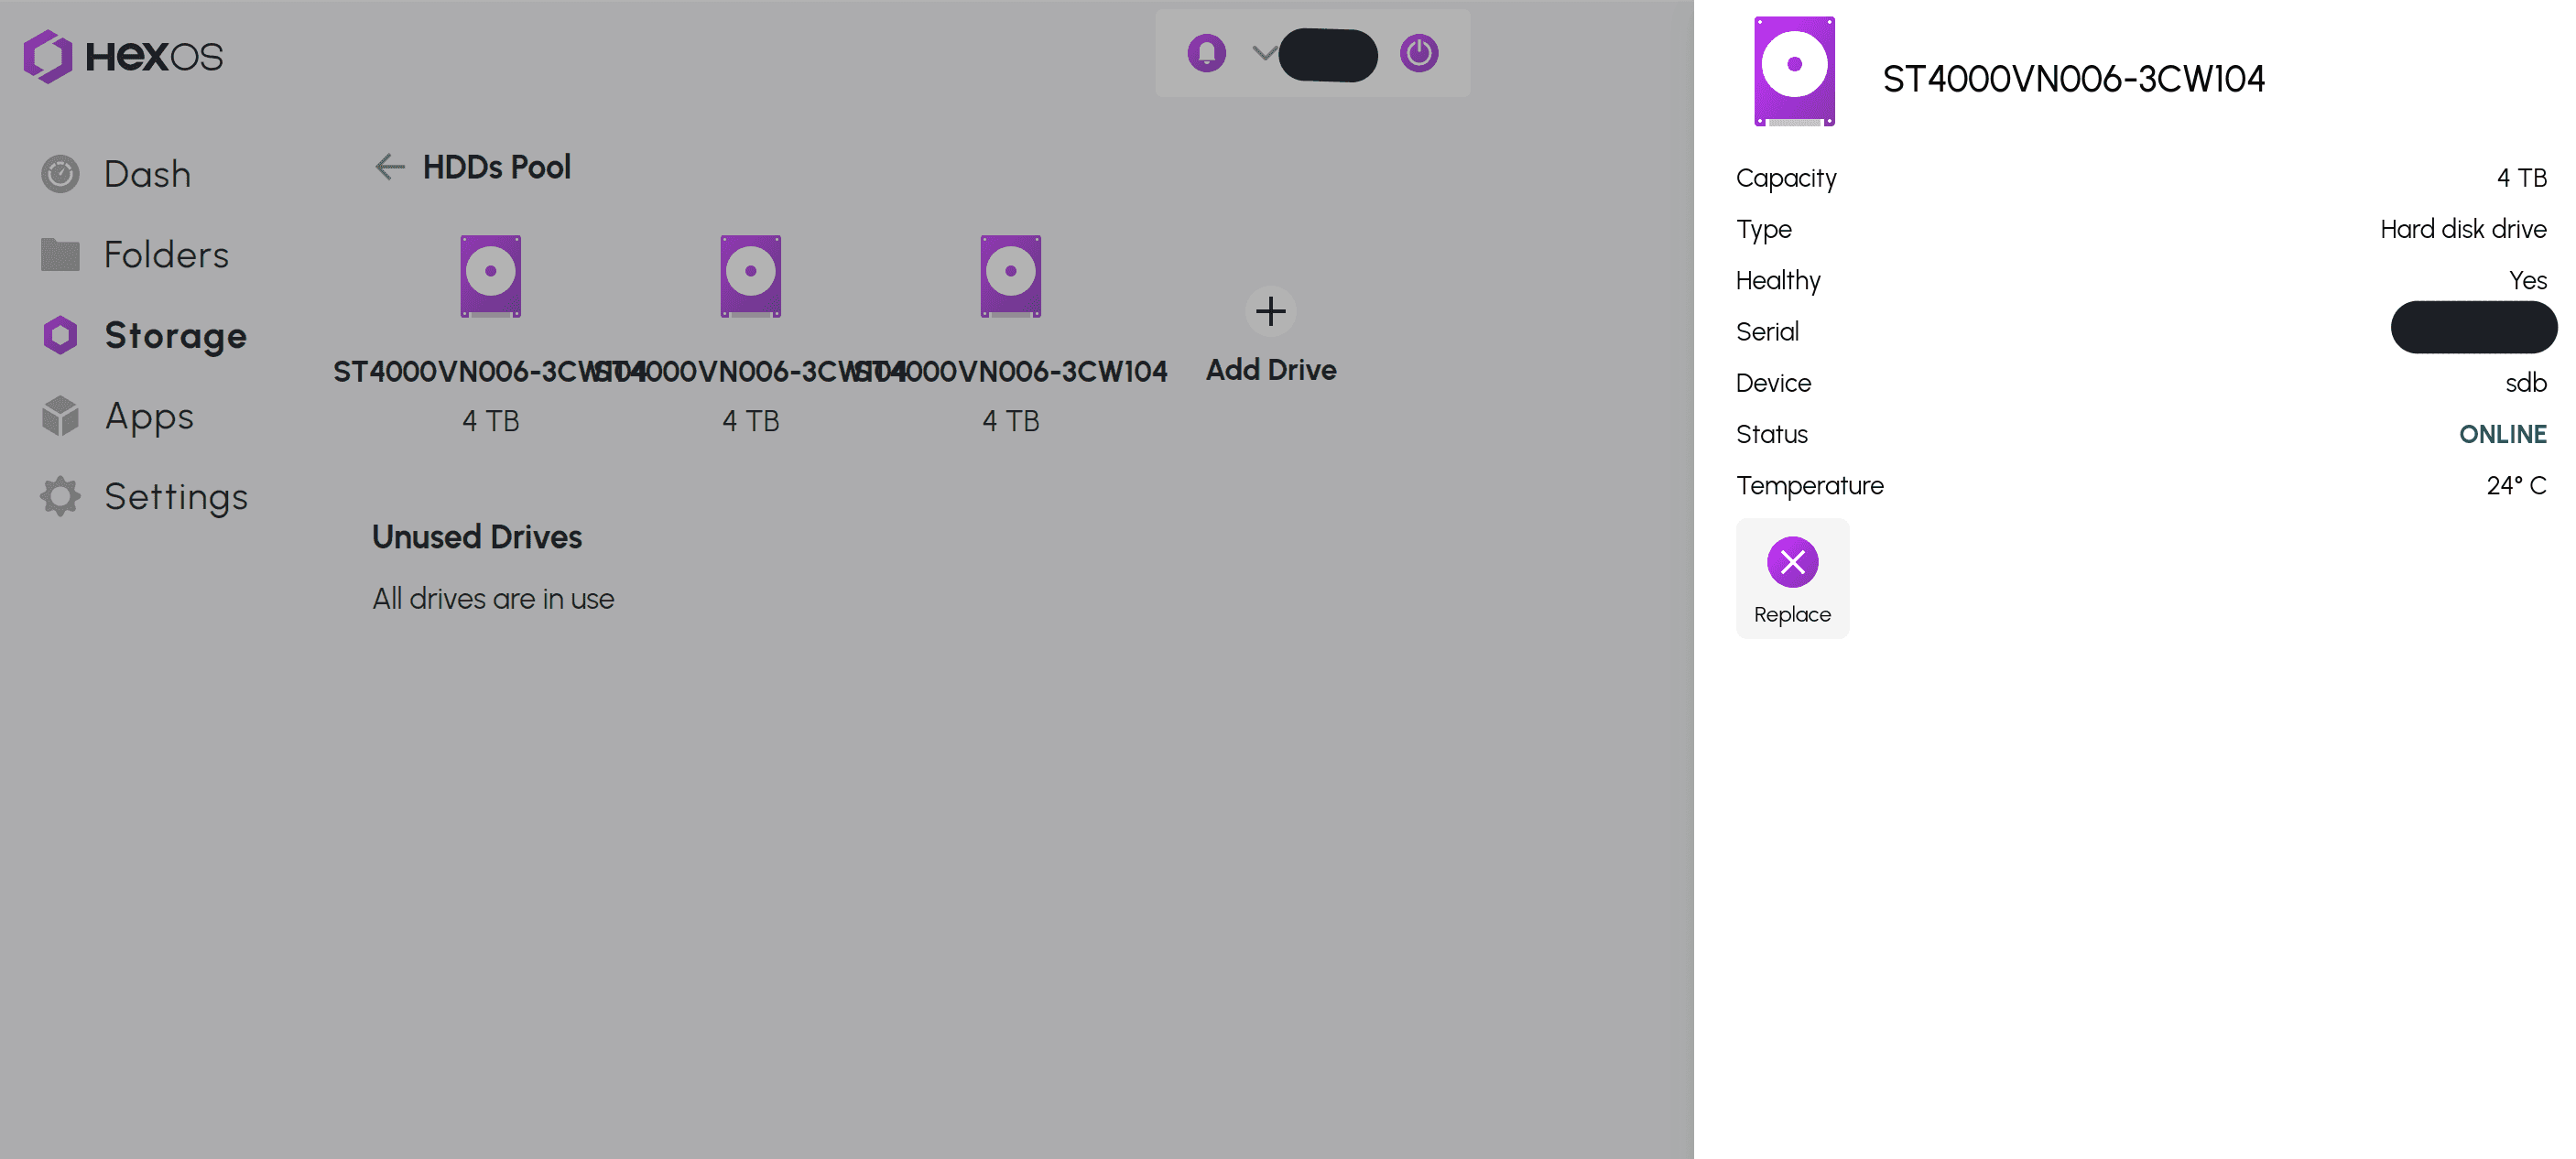
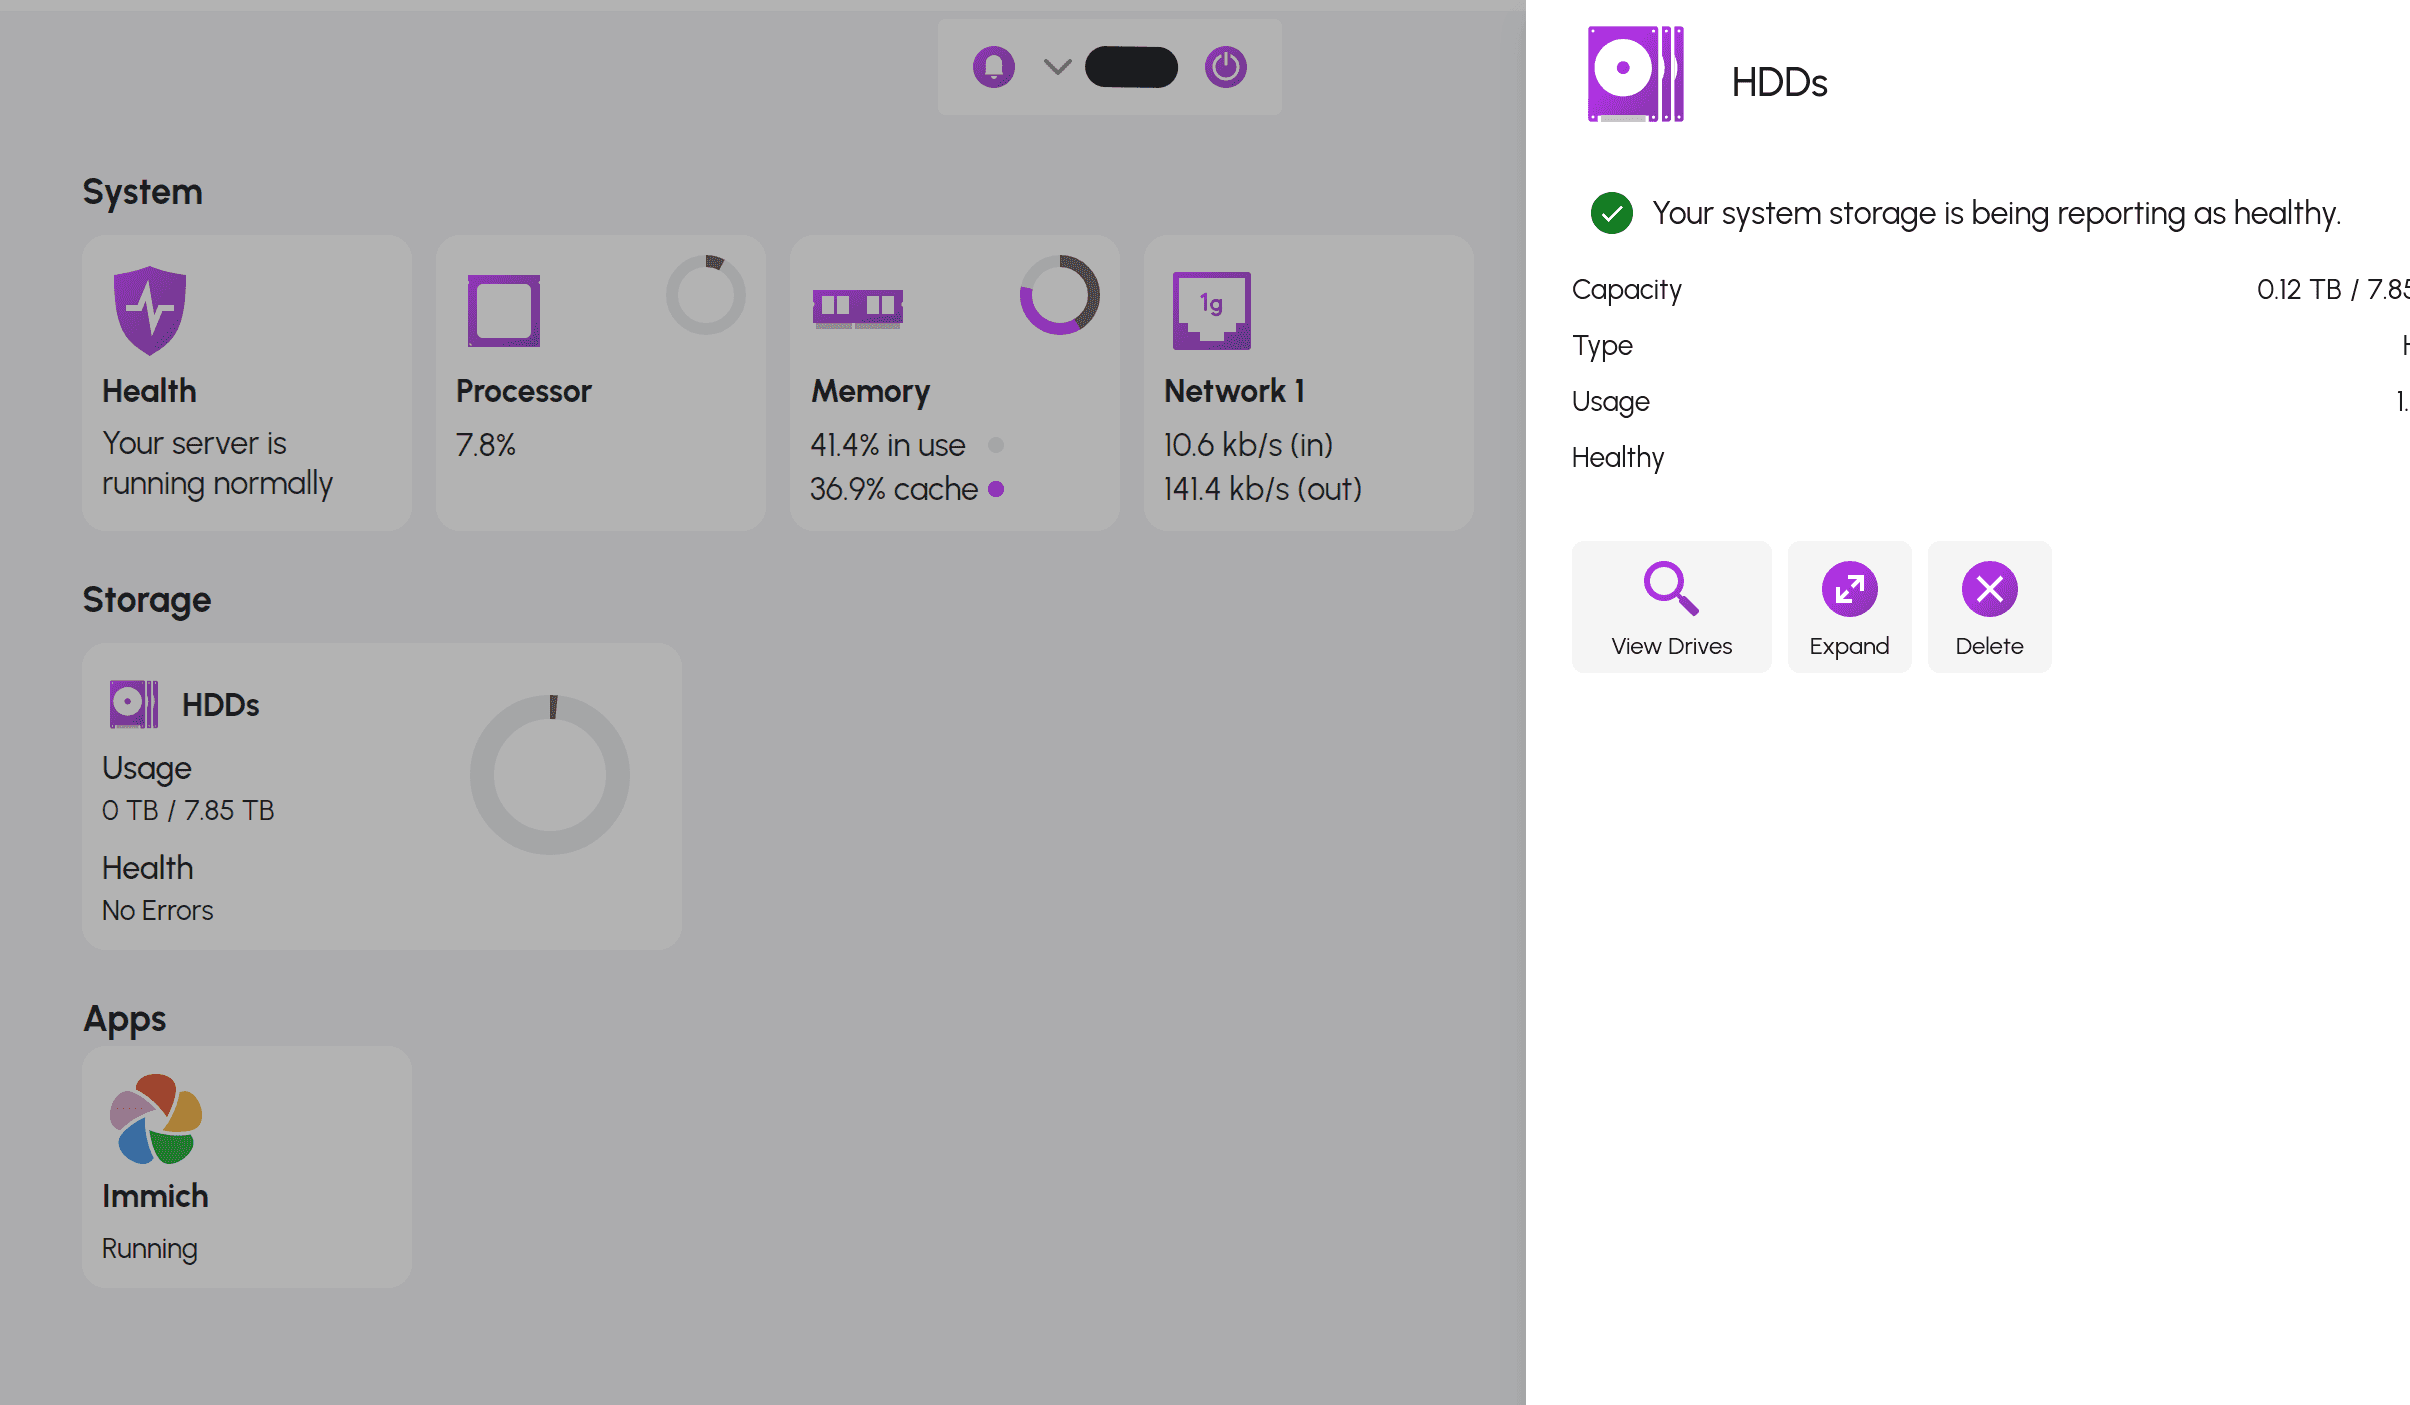
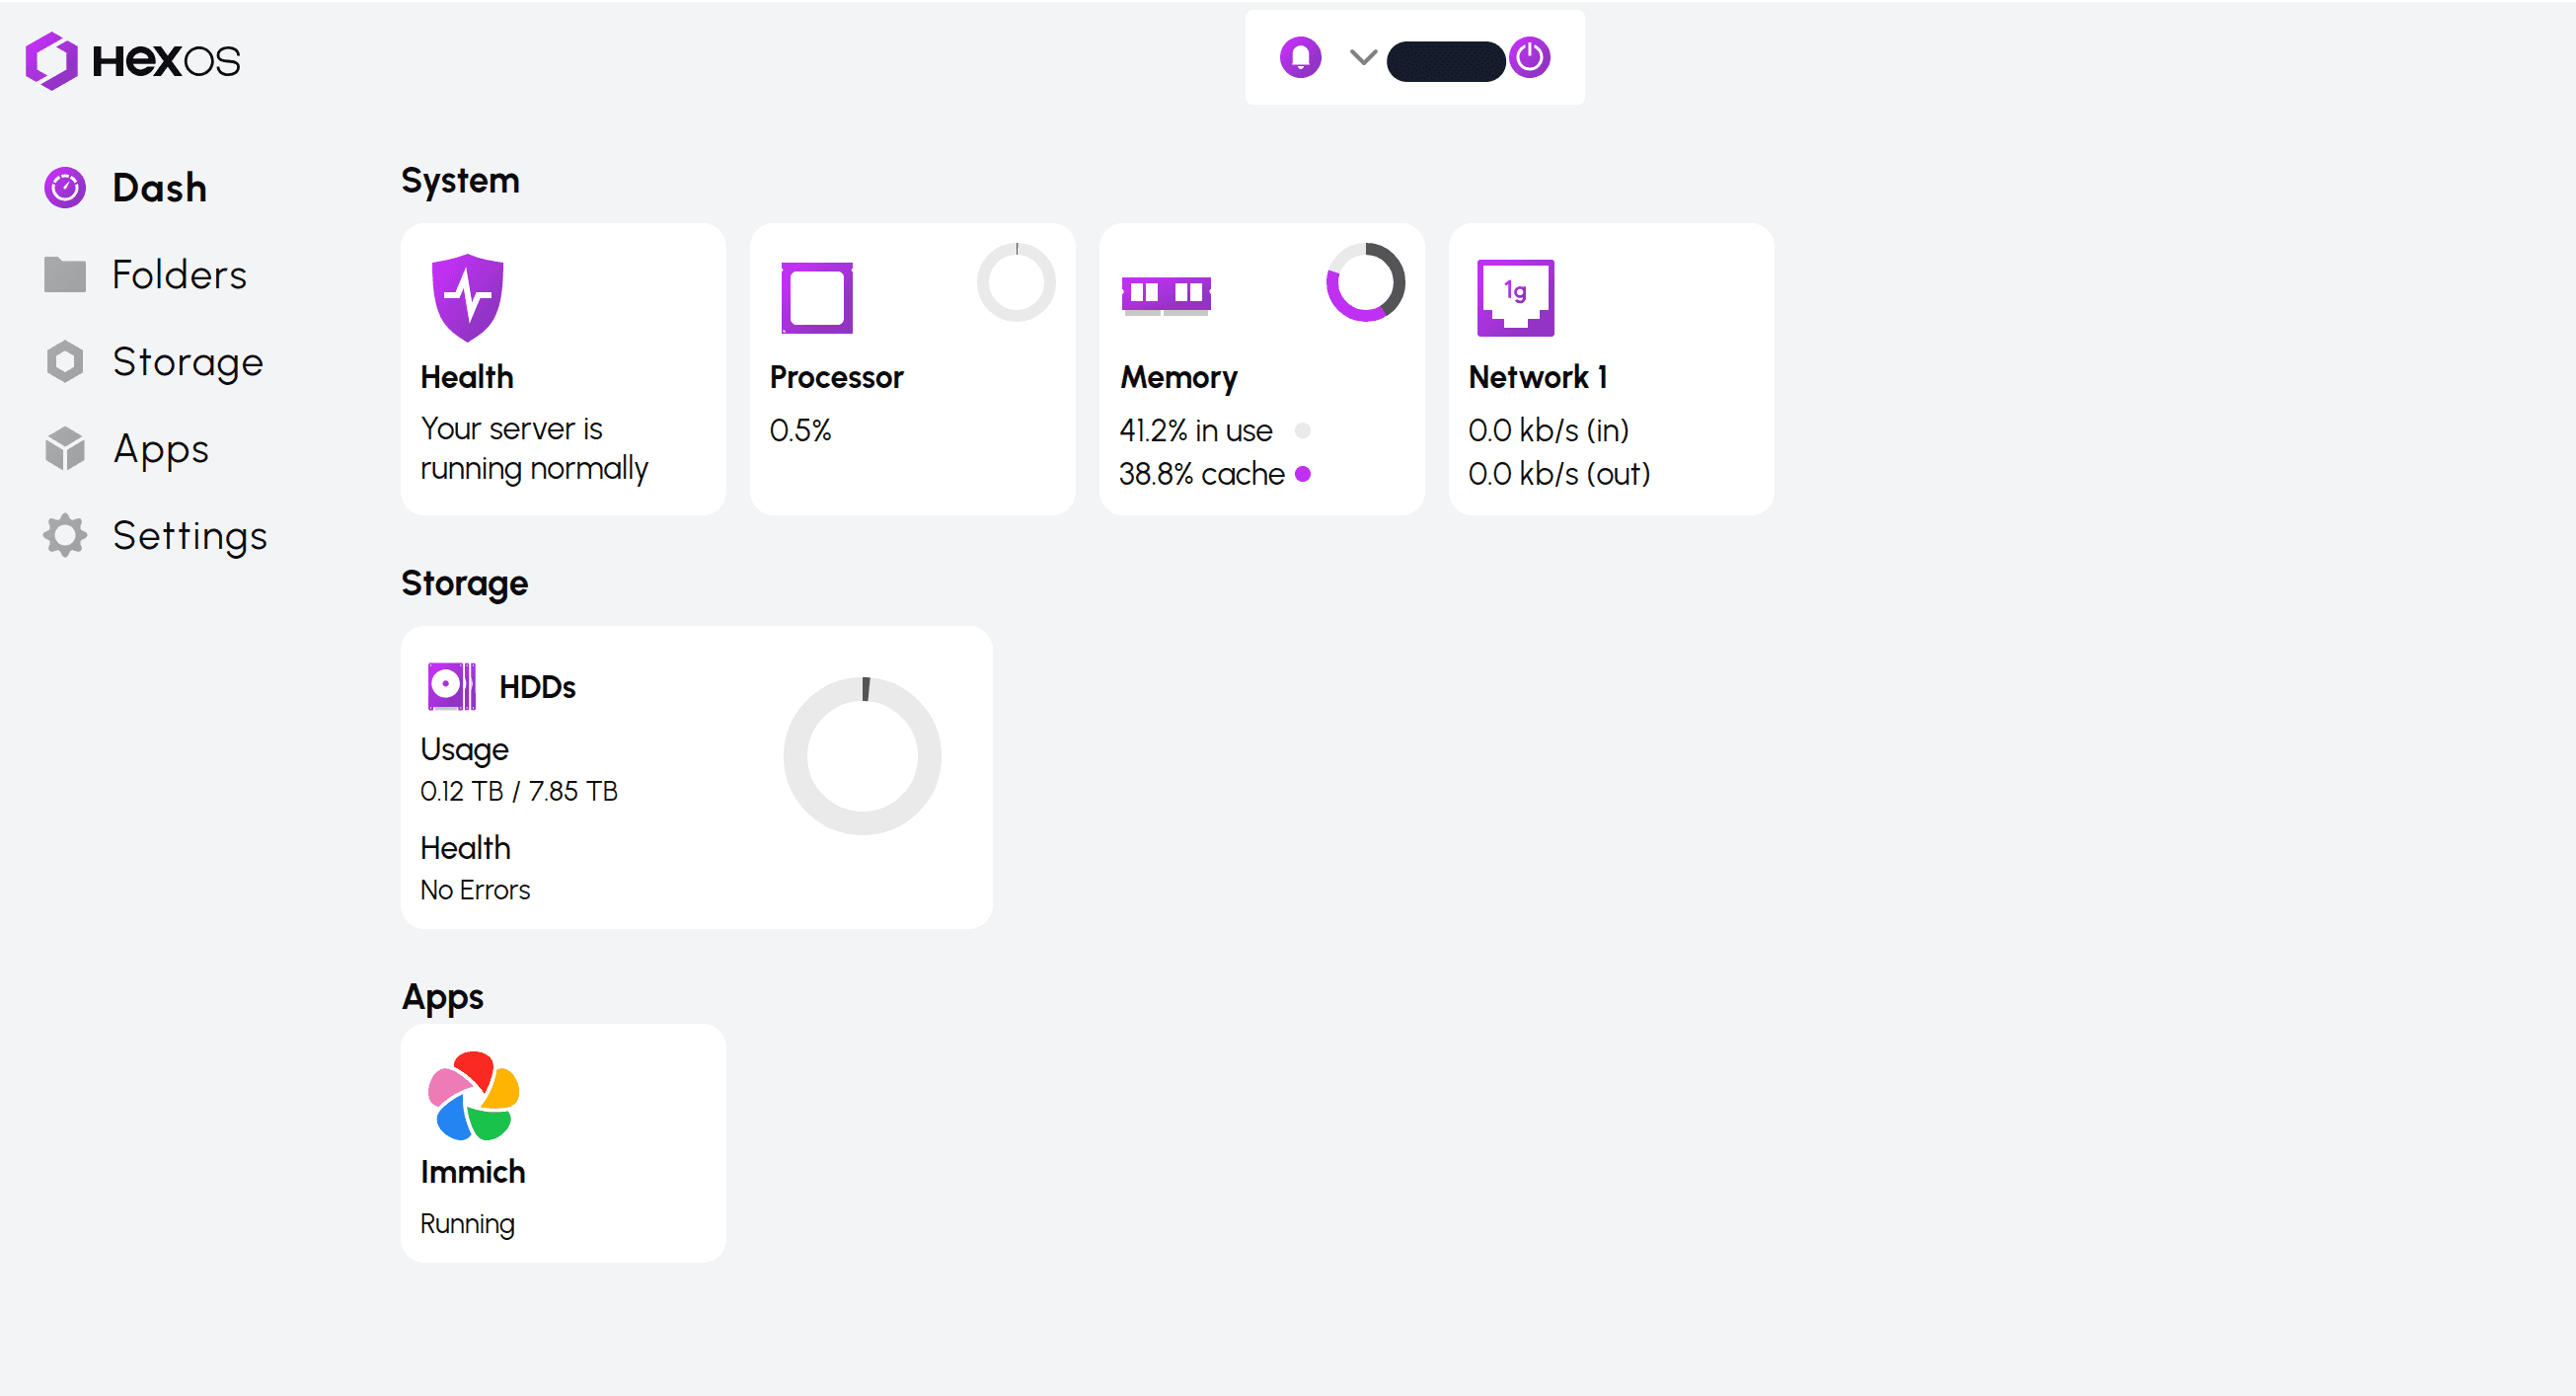
I now had a working storage pool! The UI definitely needs work, the drive names seem to overlap each other, however it all seems to work!
Using Apps
So far, HexOS only officially supports Immich and Plex. To start, I decided to install Immich. One of the big reasons I pay for extra storage on google is to backup my photos. If I am happy with my NAS, I can downgrade my google subscription and instantly start saving money!
Adding new apps is as easy as clicking install! After installing the Immich iOS app on my phone, I immediately started backing up my photos to my NAS!
Although it took about 10 hours to back up all 14,000 images and videos, it did end up working! Immich has plenty of interesting features. It has facial detection, allowing me to search for photos of my friends and family. It has smart searching, allowing me to find pictures of pizza, birds, etc. In short, it has most of the features that made Google Photos attractive to me.
One thing that I should mention, I have lots of photos of crowds. The default configuration of Immich will often detect random people in the background. By increasing the Minimum Recognized Faces, I was able to reduce the clutter from random people.
Conclusion
Now that everything is working. I have a few observations:
- The Software is still in beta. Can I trust HexOS not to delete all my photos after an update?
- HexOS not supporting Wi-Fi needs to be made clearer in the guides/marketing. Even if it is sub-optimal, HexOS should just work with Wi-Fi. I understand that TrueNAS is enterprise grade, but HexOS is supposed to be more casual. Besides, newer standards of Wi-Fi should be fast enough for most use cases anyways. As a compromise, I wouldn’t mind a warning in the dashboard when using Wi-Fi.
- It would have been nice to know about SMR before I started. The guides do not mention SMR. Additionally, I spent a few days reading the HexOS subreddit before I bought my drives, but I didn’t see anything about SMR. In retrospect, there were some threads talking about SMR, however I did not notice them.
- Hard drives really need to advertise if they use CMR or SMR. I have no idea why they do not.
- I paid for a perpetual license at $99. Is that really worth it? I am not sure - though I am happy so far. In the long run, the perpetual license will be $299. At that price point, the experience will need to be much smoother.
- There is no local UI option for HexOS at the moment. While it’s been nice monitoring my HexOS instance remotely, it would still be nice to have that backup.
- Finally, there is not an easy way to expose HexOS apps to the public internet. This needs to be something that is seamless to users. Although I could simply port-forward in my router, there are better options out there. I would love if HexOS integrated tailscale and other options. Besides making more apps available, this has to be my biggest missing feature.
In short, while I am not yet 100% sold on HexOS, I am very happy with the NAS itself. I look forward to seeing the product mature!